Regardless of the application, a tire is not a tire. In the passenger and light truck space, the type of tire largely depends on the vehicle.
Standard sedans and minivans are typically fitted with all-season or touring tires that are engineered for service in all types of road conditions, with ride, traction and/or fuel economy in mind.
Smaller light trucks and sport utility vehicles (SUV) utilize passenger tires with similar qualities, while larger light trucks require light truck tires designated with the letters “LT” to carry the higher weight of the vehicle and the cargo.
The other category of tires for passenger vehicles under 10,000 pounds is often referred to as high performance (HP) tires. Most experts will agree that the word “performance” implies a higher-level handling and responsiveness when it is applied to a tire.
Performance tires have an “H” speed rating or higher because they are designed to give the driver more control, especially when operating at higher speeds. In places outside North America where the legal vehicle speed is over 100 mph, the speed rating actually reflects the top speed for the vehicle.
For the domestic tire market, speed rating is more like a performance rating, so it should be explained as such.
From a miles-per-hour perspective, the difference between an “H” speed rating and a “V” speed rating is only 19 mph. As someone who has driven on highways in Europe with unlimited speed limits, I can tell you that the difference between 130 mph and 149 mph would probably not seem like much to the driver.
However, for the tire it will eventually become significant, so exceeding 130 mph on an H-rated performance tire for an extended period of time is not recommended. Likewise, the difference between a 149 mph V-rated tire and a W-rated tire is only 19 mph, but operating a vehicle at 168 mph on tires rated for 149 mph is not safe for the driver and/or other motorists.
In North America, the maximum legal speed limit is 85 mph on a 41-mile stretch of toll road in Texas. The western U.S. has a few states with highways that have a speed limit of 80 mph. But the overwhelming majority of the highways and interstates in the U.S., Canada and Mexico have a maximum speed limit of 70-75 mph. In that sense, speed rating should not matter.
But it does matter in terms of vehicle performance. The U.S. Tire Manufacturers Association (USTMA) and the Tire Industry Association (TIA) both agree that the original equipment (OE) speed rating for the vehicle should, at a minimum, match the speed rating on any replacement tires.
On some vehicles, the OE speed rating will be reflected on the placard and in others it will not. Regardless, the standard of care for replacement tires on passenger vehicles is that the OE speed rating must be retained or exceeded when replacing tires. If it isn’t listed on the placard, it’s reasonable to expect the retailer to access the information via the owner’s manual or any number of online websites and fitment guides. This doesn’t seem like a big deal until it is.
The lone exception to downgrading the speed rating is when using winter tires. These tires have lower speed ratings because they are engineered for cold weather conditions and road temperatures, which means they have minimal resistance to heat at high speed.
In Europe, drivers have to slow down and adjust their speed if they have winter tires. In North America, drivers with winter tires are more worried about losing control in snow and ice, so speeds rarely approach the maximum speed for the tire and handling is more related to road conditions.
A legal matter
Downgrading a tire’s speed rating in a standard fitment is a layup for any plaintiff's attorney. No matter what happened before and during an accident in which the vehicle lost control, the fact that the speed rating was insufficient for the vehicle will become problematic for the company that sold and installed the tires.
If that installation included a custom tire and wheel package completely different from the OE fitment, then the speed rating of the new tires must still be equal to or greater than the speed rating on the OE tires.
Load index is another layup if it’s less than the load index of the OE fitment. Again, installers of aftermarket tire and custom wheel packages must consider load index when replacing the OE size with a larger rim diameter and make sure it is equal to greater than the load index on the original tires.
Sometimes the extra load or “XL” version is necessary to follow the guidelines established by the USTMA and TIA that will be used in court. The XL size is more expensive, but it guarantees that the tire can carry the maximum load for the vehicle and its contents.
The same rules apply to winter tires. While they get a pass on downgrading speed rating, that pass does not exist for load index. Once again, this doesn’t seem like a big deal until it is, so why take a chance?
The industry guidelines for speed rating and load index on standard replacement tires are very clear. In both cases, the new tires, regardless of size, must have a load index and speed rating that are equal to the OE fitment. No one is going to disagree with that position.
Other factors that must be considered when selecting or replacing performance tires are rim width and tire diameter.
On OE wheels, the customer may want to go up a size and select a larger tire on the same rim. In these cases, the installer must ensure that the rim width for the larger size is compatible with the OE rim width. If the rim is too wide for a smaller tire, then excessive treadwear on the shoulders should be expected as the footprint is widened. Rim width that is too narrow for a larger tire will cause the footprint to crown and accelerate the treadwear in the center of the tread.
Proper rim width also results in the correct footprint to maximize handling at the proper inflation pressure. If the rim width is not approved for the tire, it will become a big deal even if it isn’t.
The right range
Tire diameter can become an issue when it’s too small or too large. The only published guideline is available from TIA and it states that the OE diameter must be within plus or minus 3% of the replacement tire diameter.
Plus-sizing represents the majority of the aftermarket tire and wheel fitments because vehicle owners want the visual appearance of a larger wheel. Staying with 3% of the OE diameter helps to ensure that vehicle safety systems like anti-lock brakes (ABS), electronic stability control (ESC) and advanced driver assistance systems (ADAS) operate as designed.
In particular, it’s been reported that ADAS may be affected when the ride height changes significantly, so the vehicle does not properly calculate the position of the vehicle directly in front. It won’t matter until it does.
One of my first civil cases involved a custom tire and wheel package that turned out to be around 0.15 inches over the 3% guideline. The tires were just over 1/10th of an inch larger than the allowed diameter and the plaintiff used that fact to argue that it contributed to the loss of control of the vehicle, which led to paralyzing injuries to multiple occupants.
Facts like the lack of seatbelts, excessive speed and a wine tasting earlier in the day had a minimal impact on the accident, according to the plaintiff.
Their experts focused on how the 0.15-inch difference raised the center of gravity to the point where the vehicle was unstable, which is why the industry sets 3% as the maximum difference for diameter when compared to the OE fitment. Again, this didn’t matter until it did.
Plus-sizing creates additional risk for the installer. When the replacement tire is within 3% of the OE diameter, the risk is minimal. When the replacement tire is outside the 3% guideline, the risk is increased.
Vehicle owners who want lift kits and other modifications that raise the center of gravity on the vehicle must be informed that the alterations they desire will change the handling and possibly the operation of vehicle systems like ABS, ESC and ADAS.
From there, it’s up to the installer to ensure that all of the aftermarket manufacturer guidelines are followed when making the modifications. It won’t keep the retailer out of a lawsuit in the event of an accident, but it will create a better defense if the steps that were taken during installation were consistent with the manufacturer specifications.
Mounting and balancing
While demounting, mounting and inflating performance tires is basically no different than servicing all-season tires, there are some considerations that must be made.
First, performance tires with an H-rating or higher are more difficult to demount and mount than their all-season S and T-rated counterparts.
Second, as the aspect ratio gets smaller — and sidewall gets shorter — the demount and mount process increases in difficulty. Forcing the bead opposite the valve stem sensor to demount a 35-series tire with a 20-plus- inch bead diameter is much easier when the machine has hydraulic arms to keep it in the drop center.
Likewise, mounting the top bead with a hydraulic arm is a safer practice than wedging the tire iron between the bead and the rim to keep the bead in the drop center during mounting.
Having the right equipment helps prevent bead, rim and tire pressure monitoring system sensor damage during demounting and mounting. It’s also a lot easier and safer for the technician.
The stiff sidewalls on low-profile HP tires create multiple issues for technicians during service. Besides demounting and mounting, bead seating and inflation procedures can also be affected.
Most rims have a bead hump that keeps the beads from unseating when there is little to no inflation pressure. When seating the beads, the tire will seal on the area behind the bead humps until the pressure is enough to force it over the hump and fully seat the beads against the rim flange.
On most tires, the seating process happens at low inflation pressures, so it usually results in a fairly loud “pop” or “bang” when the beads are seated. On a low-profile HP tire with stiff sidewalls, the pressure is often higher, so the audible indication of bead seating is typically louder and more severe.
As far as the maximum inflation pressure to seat the beads is concerned, the answer depends on the circumstances. The USTMA’s position is to never inflate the tire over 40 psi to seat the beads. If the beads won’t seat at 40 psi, then the tire should be deflated, repositioned on the rim, re-lubricated and re-inflated.
TIA agrees that 40 psi is enough to seat the beads in most instances, but in situations where more than 40 psi is required, it is acceptable to seat the beads in a restraining device. The technician must be able to stand outside the trajectory of the sidewall and use an inflation device that includes a clip-on air chuck and an in-line valve with a pressure gauge, so the tire beads can be seated safely in the restraining device.
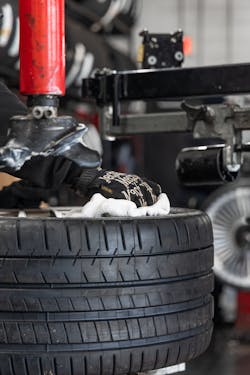
The best method to improve bead seating on a performance tire — or any tire for that matter — is to lubricate the rim in addition to the beads. Most tire technicians will lubricate the beads before mounting the tire. Part of that bead lube will be rubbed off by the rim flange during mounting, so only a portion of the bead is actually lubricated.
By lubricating the rim surface from both sides of the bead hump to the flange, the seating process typically requires less inflation pressure and concentric seating of the beads is improved. On a tire with short, stiff sidewalls, applying a solid paste lubricant to the leading edge of the bead hump before mounting the tire will also help the bead seating process and require less inflation pressure.
All in the RIST
In most cases, installation of a performance tire is the same as any other tire. Technicians should follow TIA’s RIST procedure every time a tire and wheel assembly is installed on the vehicle.
The “R” in RIST stands for remove debris from mating surfaces, which are all the places where metal touches metal. On some custom wheel fitments, the center bore of the wheel may not have a level so the fit with the concentric ring on the hub is very precise. In all cases, the area between the wheel and the ring on the hub must be cleaned. When the center bore is machined straight through the wheel, the interface with the hub must be near perfect.
The “I” in RIST requires an inspection of all the components. One area unique to custom wheels is the hub-centric ring when the center bore of the wheel is not an exact match for the concentric ring on the hub. Without these rings, the wheels may not be perfectly centered on the end of the axle, which can result in a number of different vibration and/or loose wheel conditions. If the concentric ring is damaged, then it must be replaced. It’s also important to inspect the studs and nuts for any damage or severe wear. Worn fasteners can result in the loss of clamping force at the recommended torque so they must be inspected before the wheel is installed.
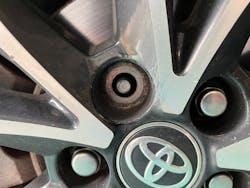
One particular type of fastener that is common in the performance tire and wheel market is the wheel lock. Wheel locks make it more difficult to remove the fastener without the special key at the end of the nut.
The precise fit between the key and the lock is both a blessing and a curse. The blessing is that no two keys are identical and “universal” keys do not work, so the wheel lock is very effective in deterring theft. The curse is that if the key is damaged, it may not fit, which creates issues that cannot be easily resolved.
Preventing wheel lock key damage is simple. Never use an impact wrench. Wheel locks are designed to be removed by hand, tightened by hand and then torqued to specification by hand. Stress on the key is magnified by the hammer mechanism in an impact wrench and compounded by the higher speed of powered tools.
Wheel locks should be removed with a breaker bar, installed by hand and then torqued to specification. Impact wrenches reduce the life of a wheel lock key. Servicing them by hand will extend the life of the wheel lock and the wheel lock key.
The next step in the RIST procedure is “S” for snug. Before torque can be applied, the assembly must be completely seated on the hub. The snug process always starts with the lug nut at the 12 o’clock position and then proceeds to the position closest to 6 o’clock, before continuing in a star pattern until all of the nuts have been snugged.
It’s also important to create tension in all of the studs so the wheel is evenly seated on the hub, especially if the vehicle is lowered to the ground for the final torque. As soon as the tires touch the ground, load is applied to the wheel. If one or more of the bolts have no tension because the nut is still loose under load, the end result can be a loose wheel, even if the proper torque was ultimately used.
Snug is also about making sure the correct fastener for the wheel is being utilized. Wheels with acorn seats require acorn lug nuts and ball seat wheels require ball seat lug nuts. Snugging the lug nuts on these wheels is relatively simple because the nuts will center when they make contact with the wheel.
Mag seat wheels, on the other hand, require extra attention because the collar on the mag seat lug nut needs to be centered in the bolt hole before it is tightened. It’s also important to make sure the washer is not frozen and spins freely to ensure it can generate sufficient clamping force without damaging the face of the wheel around the bolt holes.
Torque is the final step in the RIST procedure and it doesn’t guarantee anything. Performance tires and wheels are equipped on vehicles that are typically driven a little harder than the standard vehicle with all-season tires. Torque is important on every vehicle, but the forces applied to a performance tire and wheel assembly require extra attention on the part of the installer.
If the mating surfaces are not clean, the components are damaged or worn and/or the wheel is not properly seated on the hub, the most expensive torque device in the industry will not prevent the wheels from becoming loose.
Torque is a measure of twisting force — nothing more. Clamping force holds the wheels on the vehicle and it cannot be measured in the field. The only way to approximate the correct amount of clamping force is to control the torque and the conditions of the bolted joint.
TIA’s RIST procedure is the recipe for clamping force and it should be followed every time a wheel is installed.
As far as achieving the correct torque is concerned, the most common device is a standard clicker torque wrench. By turning the handle, the technician creates tension on a spring that causes the wrench to emit an audible click when the torque setting is reached.
In order to ensure the torque is properly applied to the lug nut, the technician should apply slow and steady pressure to the handle on the end of the wrench. When the click is heard, the pressure must stop. Bad technique — where the technician continues to apply force after the click — results in an over-torque situation. Even the slightest amount of pressure after the click can increase the torque by as much as 20 to 40 foot-pounds if it is enough to move the nut in a tightening direction.
Since a torque wrench is a precision instrument and accuracy depends partially on the condition of its internal mechanism, the tension on the spring should be released at the end of the day at a minimum. If the spring is kept in constant tension, it will eventually start losing accuracy.
Torque wrench manufacturers recommend relaxing the tension to the lowest setting on the wrench when not in use to maintain the long-term tension in the spring that is at the heart of the tool. Regular calibration in accordance with the torque wrench manufacturer is another box that must be checked in the event of a loose wheel. It won’t matter until it does.
Repair advice
Finally, any discussion on performance tires must include the topic of tire repair. Like most aspects of performance tire and wheel service, the step-by-step repair process for a performance tire is exactly the same as a standard all-season tire.
Puncture repairs are still limited to the crown area, shoulder and sidewall repairs are not allowed and the maximum size is ¼-inch.
One-piece combination repair units have a maximum angle of 25 to 35 degrees, depending on the manufacturer, while the two-piece system does not have any angle limits as long as the damage is limited to the repairable area.
For passenger and light truck tires, puncture repair procedures are universal regardless of the application.
Performance tires are different because they often have H speed ratings or higher. In some cases, the manufacturer does not recognize the speed rating after a repair and in others it does.
Some manufacturers place a limit on the number of repairs and their proximity to each other. In many cases, the tire manufacturer and the repair material manufacturer will have different limits in terms of the maximum number of repairs and proximity. From the legal perspective, the tire manufacturer guidelines always take precedence over the repair material manufacturer.
As discussed earlier, speed rating in North America is more like a performance rating that indicates how the tire will handle. The actual top speed should not be a factor because there are no roads that have unlimited speed limits.
I recently purchased a 2017 Toyota Corolla and the OE tires are P215/45R17 with an 87 load index and a W speed rating. I’ve put over 30,000 miles on it in the last year-and-a-half, so I’m confident in saying there is no possible way my car is capable of 168 mph, which is the max speed for a W-rated tire.
Toyota didn’t spec a W-rated tire because the vehicle would be traveling at 168 mph. They choose the W-rated tire because it gave the car the best handling characteristics. When I replaced the car’s tires last year, I wanted the W-rated tire because I like the way the car handles and don’t want that to change. I got them and it hasn’t.
In my opinion, the status of the speed rating after a repair should only matter if the tire will actually be operated at the maximum speed. I can see where a manufacturer is not willing to stand behind a speed rating when a repaired tire is traveling at the maximum speed and equally on-board with limiting the number of repairs and the proximity in those situations. But a properly installed repair in the repairable area should have no impact on how the tire handles.
If I get a repairable injury in a tire on my car, I will have total confidence in the structural integrity of the tire after the repair because I know it will be installed correctly. It shouldn’t matter, but it does.
If you find yourself in civil litigation, the plaintiff is going to ask a lot of questions. They are going to review the policies and procedures, training records and statements of all the key witnesses, with the goal of painting the worst possible picture of the business.
The microscope will be focused on everything that was not consistent with industry best practices in order to argue that every box that was not checked contributed to the cause of the accident that led to the lawsuit. Experts can argue about causation for hours, but there’s no defense for failing to follow the most universally accepted industry guidelines.
There have been those moments in a case where I have agreed that the defendant failed to meet the standard of care. Sometimes, I’m able to argue that it did not contribute to the accident, while in others, I have to admit that it could have contributed.
Every fault will be exposed to paint a picture of negligence for the jury. None of the details matter until they become part of an accident investigation.
If the industry guidelines for performance tire selection, service and installation are followed, the picture of the defendant (the retailer) will end up being much better in the eyes of a juror. Someday, the details may matter, so it’s best to make sure that all of the boxes are checked on every performance tire that is installed or serviced.


