Brake system service has its own set of issues, starting with “rust never sleeps.”
Especially in areas of the country that experience winter conditions, where ice-melting chemicals are applied to the roadways, closely inspect all brake lines at every opportunity (whenever a vehicle is on a lift). Some of today’s salt/brine road coatings are extremely corrosive and tend to stick to undercarriages, and are difficult to wash off. Any brake line that is even marginally suspect should be replaced.
Explain to the customer the need for such replacement and the necessity for catching the problem before it gets worse. A rotted brake line is compromised in terms of tubing wall thickness and resistance to brake system pressure. A compromised brake line obviously can result in a leakage that will, sooner or later, result in a no-brake condition.
Invest in a high quality brake line flaring tool. Inexpensive flaring tools can prove finicky, often resulting in off-center flares that will not seal correctly. Also, always use a proper line wrench when servicing brake line fittings/connections. A line wrench captures more surface area along the fitting hex, eliminating the potential for damaging/rounding-off the hex.
Leaks with new lines
If you happen to deal with stainless steel brake lines, it’s not uncommon to experience a small initial fluid leak when a new stainless line is installed. If this occurs, loosen the connection and re-tighten. This often corrects the issue. Stainless lines/flares are relatively hard and sometimes require repeated cycles of loosening and tightening in order to obtain a leak-proof seating at the flare.
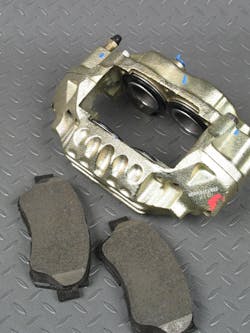
Brake calipers that feature a banjo bolt to secure the flexible brake hose to the caliper require a crush washer on both sides of the bolt (between the bolt head and caliper and between the brake hose fitting and bolt head). Never re-use crush washers. Always install new crush washers.
These soft-metal compressible washers are commonly made of copper or aluminum and are intended as one-time-use washers. As with stainless lines, new crush washers sometimes require a loosening and re-tightening in order to establish a fluid seal.
Brake bleeding
Air inside the hydraulic system causes a mushy pedal (or loss of pedal, depending on the amount of air in the system). Remember, you can compress air, but you can’t compress fluid.
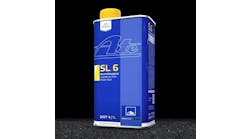
A regular schedule of bleeding provides two benefits: it provides an opportunity to remove any air that has been sucked into the system during use, and it gives you a perfect chance to freshen the brake fluid. Glycol brake fluid is hygroscopic, which means that it sucks up water like a magnet grabs grinding dust from your workbench. As little as a 3% moisture content can cut the brake fluid’s boiling point in half!
Brake fluid, even the best and most expensive fluid, will NOT last forever. This is a consumable product, and should be changed on a routine basis.
Vehicles equipped with an anti-lock braking system (ABS) require special attention when bleeding the system. If you attempt to flush and refill in the “normal” manner, you may end up with a soft brake pedal. Why? Because you haven’t flushed the separate passages in the module for solenoid activation.
You may need to use a scan tool to cycle the system. Always refer to the service manual for specific brake system bleeding steps.Improper bleeding procedures can also cause damage to a previously good master cylinder. If a master cylinder has been operating correctly for many miles of use, and the system is then bled in the course of a normal brake job, the master cylinder’s piston seals can be damaged if the pedal is pushed fully to the floor during bleeding.
Over the course of long-term use, the piston inside the master cylinder travels a relatively short distance. If the system was poorly maintained and the brake fluid has absorbed excess moisture, the end of the piston bore may feature corrosion build-up in the end of the bore that normally never experiences piston travel. If, during the bleeding process, the pedal is pushed all the way to the floor, the piston is now pushed into the corroded area, possibly damaging the seal. To avoid this during a bleeding job, you can place an obstacle, such as a block of wood, under the pedal to avoid over-traveling the piston.Whenever servicing a vehicle’s brake system, examine the fluid in the reservoir. If it appears dirty, vacuum the fluid out of the reservoirs and replace with fresh fluid prior to bleeding. This reduces the risk of retaining contaminants in the hydraulic system.
Always remember to bench-bleed any master cylinder that has been emptied of fluid. An improperly bled master cylinder will result in a low, soft pedal. This applies to a new unit as well as a used master cylinder that has been drained. This involves connecting temporary transfer tubes from the output ports into the reservoir(s), filling the reservoir(s) and slowly pushing the piston fully forward and slowly releasing several times until all traces of air bubbles are eliminated.
In some cases, even after bench bleeding via the output ports, it may be necessary to also bleed via the master cylinder’s bleed ports (if so equipped). Once all trapped air has been released, be sure to keep the fluid level in the reservoirs sufficiently high to avoid exposing the outlet orifices at the bottom of the reservoir wells before installing the master cylinder. Naturally, during system bleeding, constantly keep an eye on the reservoir fluid level to avoid running the master dry.
A note regarding the use of DOT 5 silicone brake fluid: Silicone fluid won’t absorb moisture, and it won’t damage a painted surface. Many customers choose this type of fluid because they assume that, since it won’t absorb moisture from the air, this will prevent brake line/system corrosion. However, silicone fluid can still carry moisture on its surface, so while it may help to reduce the chance of corrosion, it isn’t a magic potion. The only real advantage of using silicone fluid is because it won’t eat into a painted surface. During a fill/top-off, or if the system leaks, it may make a slimy mess, but it won’t lift paint from nearby areas.From a functional and performance aspect, it’s simply not a good choice. Silicone fluid can become very unstable at temperature, resulting in a low or ever-changing pedal feel. It’s also affected by atmospheric pressure. At higher temperatures, it expands, requiring more pedal pressure and more pedal travel. If the brakes are applied rapidly (quickly pumping the pedal manually during a panic stop), the fluid can tend to aerate and foam, resulting in a drop of pressure. For this same reason, never use silicone fluid in a vehicle that’s equipped with ABS. When ABS activates, fluid pressure is modulated quickly, which can easily result in the foaming issue.
Pedal pulsation
A variety of conditions can cause a pedal pulsation or vibration problem that can be traced to rotor runout and/or excessive rotor movement from its proper operating plane. Wheel bearing pre-load (looseness of the bearing), rotor thickness variation, rotor runout, hub runout, combined rotor and hub runout and improper tightening of the wheel assembly can each play a part in creating a pedal pulsation.
In addition to runout problems, brake pedal pulsation may be caused by variations in brake rotor thickness. Brake rotor thickness variation (not to be confused with rotor runout) causes brake pedal pulsation to occur due to changes in braking force as thick/thin portions of the rotor contact the brake pads. In order to inspect the rotor for thickness variation, measure the rotor with an outside micrometer in eight equally spaced locations. The thickness measurements should be taken approximately 0.40 in. (10 mm) from the rotor’s outer edge.
Measure rotor disc thickness at eight equidistant points along the rotor (12 o’clock, at 45 degrees, 90 degrees, 135 degrees, 180 degrees, 225 degrees, 270 degrees and 315 degrees). Record all measurements. The total thickness variation equals the maximum thickness minus the minimum thickness. If total variation is beyond the specification for that vehicle, the rotor may be resurfaced (only using an on-the-car caliper mounted lathe), or replaced.We’ve addressed this issue many times before, but it always bears repeating. A pulsating/bouncing brake pedal is likely due to a warped brake rotor or excessive lateral runout. This causes the brake pads to move in and out of their bores as they contact the uneven rotor surface.
Checking for runout is simple. First make sure that the brake rotor is fully secured to the hub using all of that wheel position’s fasteners, and torque all fasteners to the specification listed for the wheel mounting. You must simulate the installed wheel condition in order to achieve an accurate runout reading.
Mount a dial indicator (clamp-on or magnetic base style) and place the indicator plunger 90 degrees to the rotor surface, about 1/2-inch from the rotor outer edge. Adjust the indicator with about 0.050-inch preload, and then zero the gauge. Slowly rotate the rotor/hub a full 360 degrees and note runout. If more than about 0.0025-inch runout is found, correction is needed. Before assuming that you need to replace a warped rotor, place matchmarks at one of the wheel fastener locations (mark the stud and that fastener location on the rotor hat). Remove the rotor and re-install at about a 45-degree clock position and re-check runout. You may be able to minimize/correct the runout by changing the clock position of the rotor relative to the hub.
Wheel fastener torque can affect rotor runout. Excessive and/or uneven applied fastener torque, especially with regard to a thin-hat rotor design, can easily distort the rotor. While shop time is valuable, the use of an impact wrench is not recommended for wheel installation. Especially in the case of alloy wheels and thin-hat brake rotors, use only a calibrated torque wrench, and always follow the proper tightening sequence in order to evenly spread the clamping load across the hub face.
Another possible cause of a brake “pulse” may be the result of front wheel hub service on a vehicle equipped with ABS, when only one hub has been replaced. This could cause the driver to feel ABS false activation when coming to a slow stop on dry pavement. False activation is usually described as a pulse in the brake pedal when not expected. The pulsation comes from the ABS valves cycling the supposedly locked-up wheel. This is due to the difference in signal strength from the wheel speed sensors (WSS) side to side.The problem is usually associated with air gap difference or wiring and/or connector integrity. In many cases, removing the WSS from the other side, if possible, and cleaning the mounting surface may repair the problem. The rust buildup actually lifts the WSS from the bearing, increasing the air gap and weakening the signal. Another possible issue is play in the bearing causing sine wave frequency change and or AC voltage variation. A cracked ABS tone ring (located on the outer CV joint, on the hub or inside the rotor, depending on design) can also cause the ABS warning light to illuminate due to small variations in the signal caused by the crack(s).
Pad bedding/break-in
As the pads mate with the rotor disc surface, and depending on the type of pad formula, a small amount of friction material is transferred to the disc surface, which increases braking efficiency. If the replacement pads differ from the original pads (in terms of friction material formulation), and are to be used with the original rotors (when changing pads but not the rotors), an initial break-in is recommended.Drive the vehicle through a few moderate braking exercises in order for the new pads to “wipe” the disc surfaces of the previous embedded friction material. Then continue to drive with moderate braking (at speeds of around 35 mph to 40 mph) in order to “bed” the new pads to the disc surfaces. However, some brake pad manufacturers note that no bedding-in procedure is necessary with certain pads, so don’t make assumptions. Read the instructions (if provided) that came with the new pads.
Regardless of the type of pad formula, it’s still not a bad idea to perform a few moderate braking procedures before the need to perform more extreme braking, if for no other reason than to “mate” the pads to the disc surfaces.
A note regarding rotor disc surface preparation is applicable when discussing the installation of any new set of brake pads. The rotor disc surfaces should be clean. That does not mean simply wiping the surfaces down with a rag.In order to remove residue (dirt and potential oils/grease from used rotors, and packing/shipping rust inhibitors on new rotors), the disc surfaces should be washed and scrubbed thoroughly with a fast-drying solvent, and if time permits, this should be followed up with a hot scrubbing bath with a detergent (Dawn dish washing detergent is a favorite).
A hot soapy bath followed by a thorough hot rinse will aid in removing any contaminants that the solvent didn’t remove. Also, if you do treat the rotors to a hot bath and hot rinse, it’s a good idea to immediately follow this with a cold water rinse (this will reduce the chance of light surface rusting on the bare metal), followed by blow-drying with compressed air.
EPB service
Servicing a vehicle equipped with EPB (electronic parking brake) presents its own challenges. In order to retract caliper pistons prior to caliper removal, specific steps are required to avoid problems during both caliper removal and installation. Using a scan tool is typically going to be the manufacturer’s recommended method to retract the calipers to their service position to allow rear brake service or pad replacement. The scan tool is then used again to exit the service mode and automatically adjust the pads to the correct clearance after the rear brake service is performed.Refer to the February 2018 issue of MTD’s sister publication Auto Service Professional (find it on www.autoserviceprofessional.com) for a technical article by Jeff Taylor that provides detailed look at EPB systems.
Brake light switch
While it won’t affect braking performance, a faulty brake light switch will result in the loss of brake light activation. If a no-brake-light concern is found, naturally you’ll inspect bulbs and fuses. However, if the brake light switch requires replacement, be aware that in some models (Chryslers, for example) feature a one-time-use switch. This type of switch is designed to set its adjustment during initial installation. If installation steps are not followed properly, or if a previously functioning switch is removed, it must be discarded and replaced.
When dealing with this type of switch, don’t be in a rush. Take your time to perform the proper installation steps. Otherwise you’ll waste time and money by buying and installing additional switches. These switches are generally labeled with a warning (“Do not re-use”, etc.). ■
